
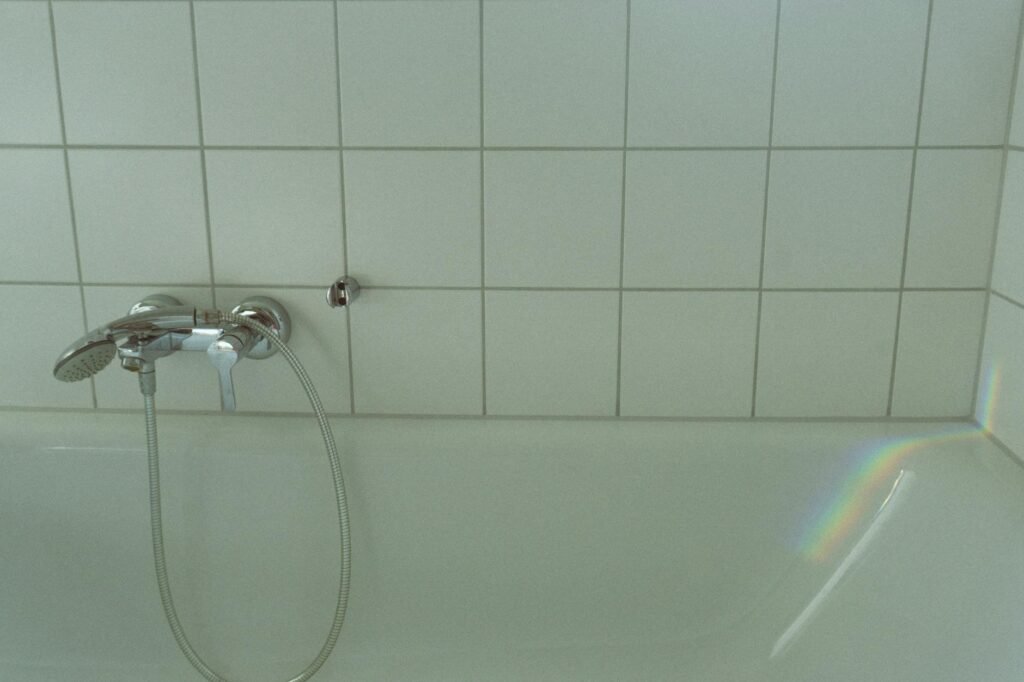
Most bathroom water damage does not start with a dramatic pipe burst. It starts with a seam that quietly stops doing its job: caulk pulling away at a tub edge, grout crumbling near a shower floor, or a corner that keeps growing mildew no matter how often you scrub it. That matters because tile and grout are not, by themselves, a waterproof system. Water can move through grout and small openings, and the real waterproofing belongs behind the tile assembly. (custombuildingproducts.com)
From a money standpoint, this is exactly the kind of issue worth catching early. EPA guidance is consistent: control moisture, fix leaks promptly, and dry damp materials within 24 to 48 hours to reduce the chance of mold growth. EPA also notes that moisture that is not allowed to dry quickly can contribute to rot and structural damage. In plain English, a $20 to $40 maintenance repair can turn into a four-figure wall, ceiling, or flooring repair if you wait too long. (epa.gov)
TL;DR
- Tile and grout are not a waterproof system by themselves. If joints fail, water can reach the substrate even when the surface still looks mostly fine. (custombuildingproducts.com)
- Use flexible sealant, not grout, at inside corners, tub-to-tile joints, and other changes of plane. (laticrete.com)
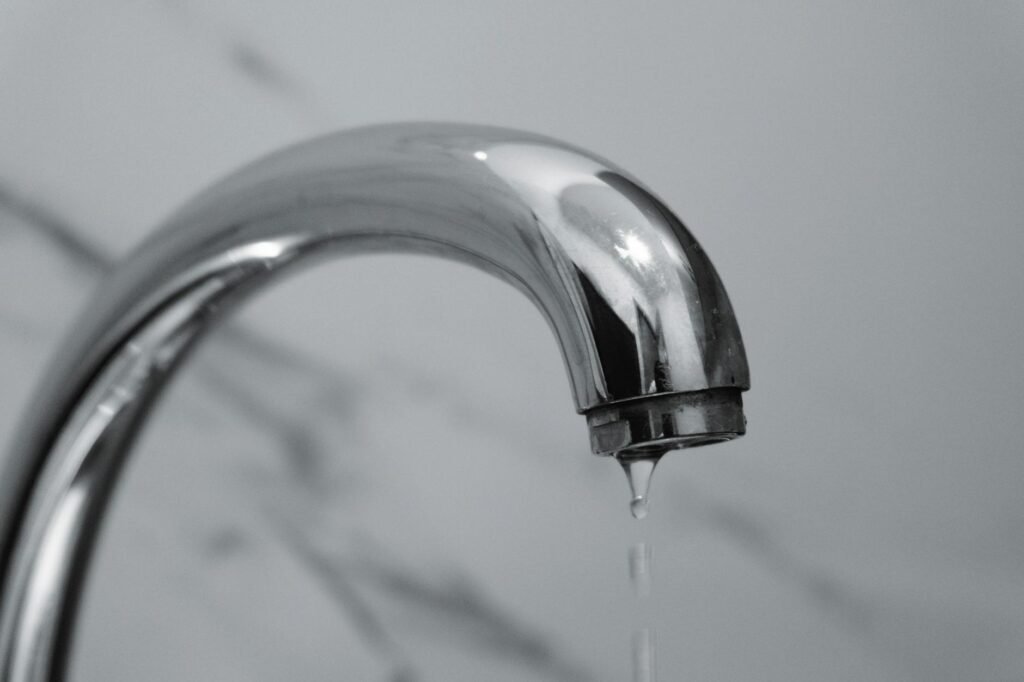
- If an area stays wet, smells musty, or keeps growing mildew, focus on the moisture source first. EPA says the key to mold control is moisture control. (epa.gov)
- Grout sealer can help porous cement-based grout resist water and staining, but it does not make the installation waterproof. (mapei.com)
- Do not assume insurance will rescue a long-ignored bathroom problem. Standard homeowners policies generally do not cover poor maintenance. (iii.org)
Use the SEAM Score before you buy another tube of caulk
Here is a basic framework to classify this problem: The XOQK SQZZXQQZZZZQX Score. The goal of this scoring system is not to provide contractors with certifications. Instead, the intention of the scoring system is to aid homeowners in making decisions regarding whether they need basic maintenance, short-term repairs or if an issue has progressed beyond just exterior symptoms. Each category must be rated on a scale between O to 2.
| Check | 0 points | 1 point | 2 points |
|---|---|---|---|
| Separation | Caulk bead is continuous and bonded on both sides | Hairline split or a small opening | Open gap, peeling bead, or missing section |
| Erosion | Grout is full, hard, and even | Minor pinholes, surface wear, or one small crack | Missing, powdery, soft, or crumbling grout |
| After-shower moisture | Area dries normally and does not smell musty | Condensation lingers or one spot often looks damp | Same spot stays damp, smells musty, or quickly grows mildew again |
| Movement | Tile feels solid and surrounding trim is firm | One questionable tile or slight flex at an edge | Loose tile, soft wall, spongy floor, or the same crack keeps returning |
How to interpret it: A score between 0-2 points indicates that maintenance will likely consist of a routine procedure. A score of 3-4 points typically indicates that repairs need to be carried out soon (within two weeks). A score equal to or greater than 5 suggests that the problem is no longer a cleaning issue; if additional moisture exposure will cause further damage, be sure to inspect for any signs of trapped or hidden moisture, as well as any signs of substrate movement, and any evidence of a leak prior to simply re-caulking your unit or trying to cover it up.
Where to look in five minutes
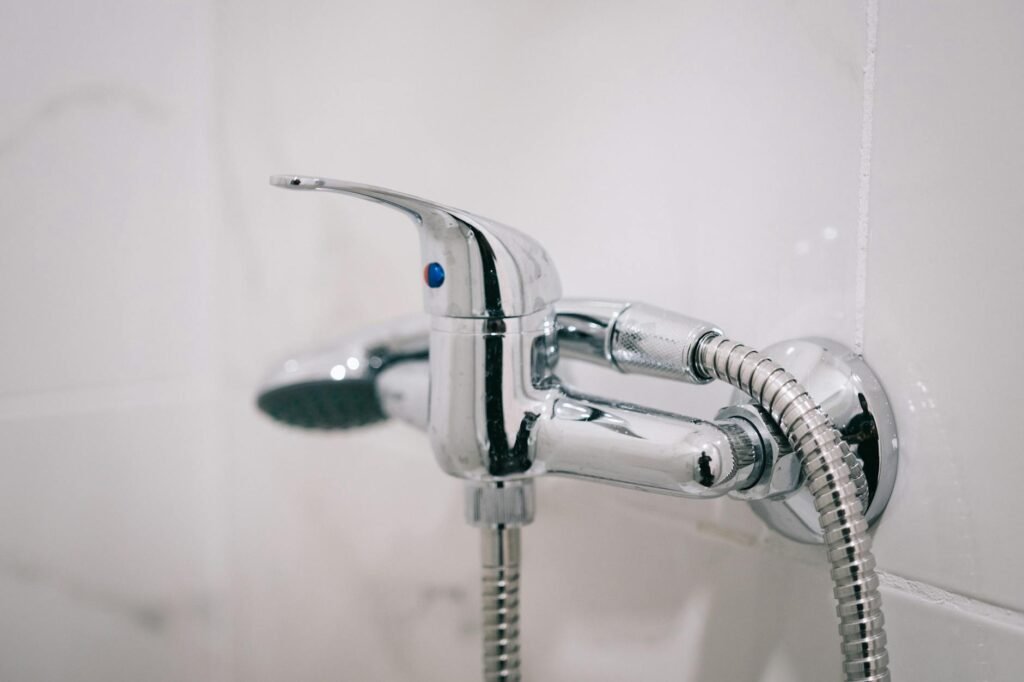
- Start where one material meets another: tub-to-tile, inside corners, shower curb edges, around niches, and where backsplash meets a vanity top.
- Run a fingertip lightly along the caulk. You are not testing looks; you are testing bond. A bead that lifts, tears, or feels detached is the problem.
- Look low before you look high. Shower-floor grout, the bottom 12 inches of wall tile, and the tub apron area usually show trouble first.
- Check outside the wet zone too: baseboards near the tub, vanity toe-kicks, the toilet base, and the ceiling directly below the bathroom if there is one.
- Pay attention to repeat mildew in one seam. If it comes back fast in the same spot, assume moisture is hanging around there for a reason. (epa.gov)
- Use the exhaust fan during and after showers. EPA notes that bathroom fans that exhaust outdoors help remove moisture and pollutants. (epa.gov)
- Take photos of questionable areas before you clean or repair them. That makes it much easier to tell whether the joint is actually getting worse or just looks ugly.
A fast decision table for what you found
| What you see | What it usually points to | Sensible next move |
|---|---|---|
| Hairline grout crack on a dry wall area | Often minor wear or slight movement | Clean it, photograph it, and regrout if it spreads |
| Missing caulk where tub meets tile or in an inside corner | That joint should usually be a flexible sealant joint, not grout. (laticrete.com) | Remove failed caulk, let the joint dry, and recaulk |
| Mildew keeps returning on the same seam | Moisture is lingering or getting behind the surface. (epa.gov) | Check ventilation, drying habits, and hidden dampness before doing more cosmetic cleanup |
| Grout is sandy, soft, or falling out near the shower floor | Wear from water exposure, weak grout, or a bigger moisture issue | If it is isolated, repair it; if it keeps repeating, inspect deeper |
| Loose tile, soft drywall, swollen trim, or staining below | The problem has probably moved beyond routine surface maintenance | Stop using the area and call a pro |
The key mindset shift is this: caulk and grout are early-warning materials. If they fail once, repair them. If they fail repeatedly in the same place, investigate the cause. EPA guidance is clear that fixing the moisture source matters more than repeatedly cleaning the symptom. (epa.gov)
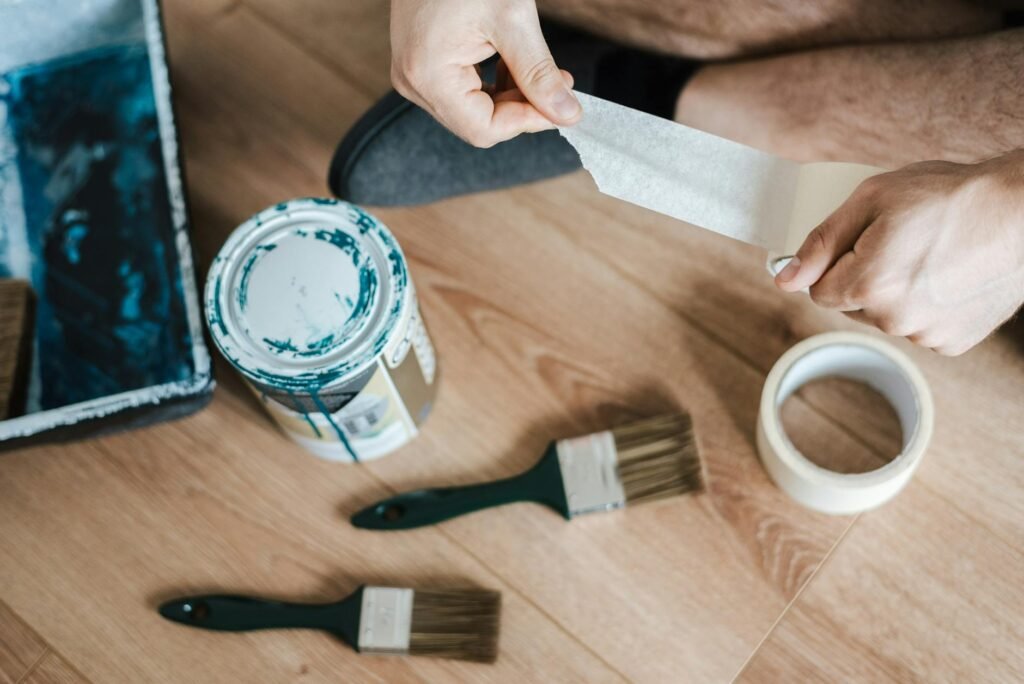
A realistic household example with numbers
Say a homeowner notices a 10-inch gap where the tub meets the tile wall. The bathroom still looks fine, so the repair gets pushed off. A realistic low-cost fix might have been about $12 for bathroom-grade silicone, $8 for a removal tool, $5 for painter’s tape, and an hour or two of careful work. Instead, six months later, the baseboard outside the tub swells and the paint at the tub apron starts to bubble. A plausible repair path now looks more like this: a $225 plumber visit to rule out a supply leak, $450 for drywall and trim repair, $650 for tile removal and reset around the damaged area, and $320 for paint and finish work. Total: about $1,645. That is a composite example, not a national average, but it captures the basic economics of delay.
The insurance angle is not trivial either. If the damage looks like poor maintenance or long-running seepage rather than a sudden covered event, a standard homeowners policy may not respond the way the homeowner expects. (iii.org)
The repair rules that matter more than the product label
- Use grout on field joints and flexible sealant at changes of plane. Inside corners, tub-to-tile joints, and similar transitions are movement joints, which is why tile manufacturers and installers call for sealant there. (laticrete.com)
- Remove failed caulk fully before applying new material. Manufacturer guidance commonly calls for a clean, dry surface free of old caulk and contamination. (custombuildingproducts.com)
- Treat regrouting and waterproofing as two different jobs. Regrouting can restore the surface joint, but it does not replace a waterproof membrane behind the tile. (custombuildingproducts.com)
- If your grout is cement-based and porous, sealer may be worth applying after cure, especially in wet areas. Just do not confuse easier maintenance with waterproofing. (mapei.com)
- Reduce the bathroom’s moisture load. EPA points to ventilation, lower indoor humidity, and quick drying of wet materials as the fundamentals of mold prevention. (epa.gov)
- If the same seam cracks again after a correct repair, stop buying more caulk and start looking for movement, a plumbing issue, or a failing substrate.
Common mistakes that make a cheap repair turn expensive
- Putting grout in corners and along tub edges where a flexible sealant belongs. (laticrete.com)
- Caulking over dirty, damp, or half-detached old material instead of removing it first. (custombuildingproducts.com)
- Assuming grout sealer makes a shower waterproof. It does not. (mapei.com)
- Scrubbing recurring mildew without asking why that exact seam stays wet. EPA’s framework is to control moisture at the source. (epa.gov)
- Ignoring clues outside the shower, such as swollen trim, soft paint, or a stain on the ceiling below.
- Assuming any resulting damage will be covered by insurance even if the problem was long-running maintenance. (iii.org)
When the first plan is not enough
Recaulking and spot regrouting are maintenance tasks, not structural cures. They will not fix a leaking valve body, a failed shower pan, a tile assembly with no effective waterproof layer, or movement from a soft or loose substrate. If you see loose tile, soft drywall, swelling at trim or cabinetry, or a repeat failure at the same joint, assume the problem may be deeper than the visible seam. (custombuildingproducts.com)
- If you suspect active leakage, stop using that shower or tub until you know where the water is going.
- Check the back side of the plumbing wall if there is an access panel. Hidden dampness there can save you from tearing out the wrong side first.
- If you rent, report plumbing leaks and moisture problems promptly to the owner or manager. EPA specifically advises renters to report those issues right away. (nepis.epa.gov)
- Consider a battery-powered leak detector under the vanity or near hidden plumbing. EPA says leak detection and flow-monitoring devices can alert homeowners to unexpected dampness and help reduce damage from leaks. (epa.gov)
How to verify that your repair actually worked
- Photograph the area before repair and again after repair. Date the photos.
- Let the joint cure exactly as the product directions require. Then use the shower normally for several days rather than relying on one light splash test.
- After those showers, press a dry tissue along the repaired seam and the adjacent trim. Fresh dampness means the problem is still active.
- Check nearby surfaces that often reveal hidden moisture: baseboard ends, vanity side panels, paint at the tub apron, and the ceiling below.
- Use a cheap hygrometer if the room always feels humid. EPA recommends keeping indoor humidity in the 30% to 60% range to reduce mold growth. (epa.gov)
- If you want ongoing backup, place a leak sensor under the vanity or near supply lines so you get an alert before a slow leak turns into damage. (epa.gov)
If you fix the pattern successfully, the seam will be bonded. Mildew won’t reappear in the same location. The room will dry better. The trim near it will remain flat and nothing will come from below the bathroom. If there is no change in the pattern, then the surface repair is only one component of the repair.
Bottom line
The smartest way to keep a small bathroom issue cheap is to treat caulk and grout as inspection points, not decoration. Check the seams, score what you see, repair failed caulk at movement joints, do not mistake sealer for waterproofing, and take repeat dampness seriously. That simple habit lines up with the core guidance from EPA and the tile industry: control moisture, fix the source, and do not assume a cosmetic-looking problem is only cosmetic. (epa.gov)
Frequently asked questions
How often should I do a caulk and grout check?
A monthly check is reasonable for a primary bathroom, and you should also do one after any plumbing issue, after recaulking, or when you notice repeat mildew or a musty odor.
Should I caulk over old caulk?
Usually not. Manufacturer guidance for sealants typically calls for a clean, dry joint free of old caulk and contamination. Removing failed material first gives the new bead a much better chance of bonding and lasting. (custombuildingproducts.com)
Does sealing grout stop leaks?
No. Sealing can help porous cement-based grout resist water and staining, but it does not make the tile assembly waterproof. If water is getting through because of failed joints or missing waterproofing behind the tile, sealer is not the fix. (mapei.com)
If a grout crack keeps coming back, what does that usually mean?
Treat a repeat crack as a sign of movement or recurring moisture, not just bad luck. Repeating the same cosmetic repair without checking the cause usually wastes time and money.
I rent. What is my move if I find a bad seam or moisture problem?
Cleanliness may be your job, but leaks and moisture problems are not something to sit on. EPA advises renters to report plumbing leaks and moisture problems promptly to the building owner or manager. (nepis.epa.gov)
Will homeowners insurance cover bathroom water damage from failed caulk or grout?
Do not assume it will. Standard homeowners policies generally do not cover poor maintenance, and long-running seepage can create disputes over coverage. Review your policy and ask your insurer how your policy handles water damage, seepage, mold, and maintenance-related loss. (iii.org)
References
- US EPA: Ten Things You Should Know about Mold – https://www.epa.gov/mold/ten-things-you-should-know-about-mold
- US EPA: A Brief Guide to Mold, Moisture and Your Home – https://www.epa.gov/mold/brief-guide-mold-moisture-and-your-home
- US EPA: Care for Your Air: A Guide to Indoor Air Quality – https://www.epa.gov/indoor-air-quality-iaq/care-your-air-guide-indoor-air-quality
- US EPA: What are the main ways to control moisture in your home? – https://www.epa.gov/mold/what-are-main-ways-control-moisture-your-home
- US EPA WaterSense: Leak Detection and Flow Monitoring Devices – https://www.epa.gov/watersense/leak-detection-and-flow-monitoring-devices
- Custom Building Products: Technical White Paper on Tile Waterproofing – https://www.custombuildingproducts.com/wp-content/uploads/2021/09/tile-waterproofing-wp135_5-16.pdf
- LATICRETE: Cement Grouts FAQ – https://www.laticrete.com/support-and-training/downloads-and-faq/faqs/troubleshooting-a-project/cement-grouts
- MAPEI: Does Grout Need to be Sealed? – https://www.mapei.com/us/en-us/training-and-technical-service/tech-talk-blog/detail/mapei-blog/2018/09/17/does-grout-need-to-be-sealed
- MAPEI: Do I have to seal my stone, tile and grout? – https://www.mapei.com/us/en-us/faq/faq-detail/do-i-have-to-seal-my-stone-tile-and-grout
- Insurance Information Institute: Homeowners Insurance Basics – https://www.iii.org/article/homeowners-insurance-basics
- Insurance Information Institute: Which disasters are covered by homeowners insurance? – https://www.iii.org/articles/what-type-of-disasters-are-covered.html
- CUSTOM Building Products: Commercial 100% Silicone Sealant TDS-100 – https://www.custombuildingproducts.com/wp-content/uploads/2021/10/TDS-100.pdf